

vegetable
patch design
Wicking Beds
how to build a wooden wicking bed - page 2
12. cut hole and insert
PVC outlet/observation pipe
- Take a 400 mm section of 90 mm PVC pipe and cut a 20 mm hole near one end so that the edge of the hole is 7 cm from from the end of the pipe.
- Cut slots or drill holes at the 20 mm hole end of the pipe to allow water to flow into the pipe.
- Once you have done this hold the pipe upright with the 20 mm hole at the bottom and push the 20 mm threaded tank outlet through the 20 mm hole so that the PVC pipe stands upright.
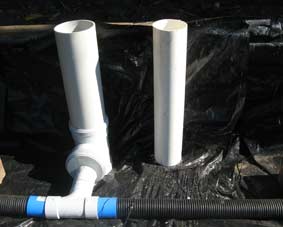
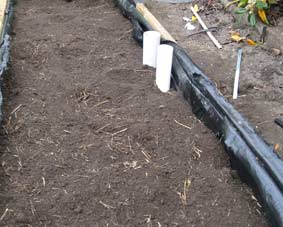
On the left is the 100 mm inlet pipe with T piece and Reducer to 50 mm T piece. On the right is the 90 outlet/observation pipe.
50 mm agricultural pipe laid out in a loop.
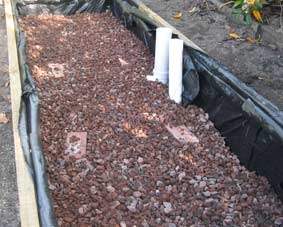
Stones added to a height of around 70 mm.
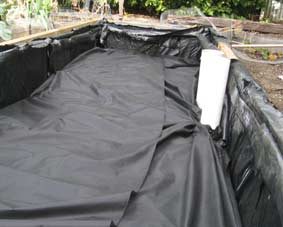
Stones covered with two layers
of non woven weed matting.
Wicking bed with soil added.
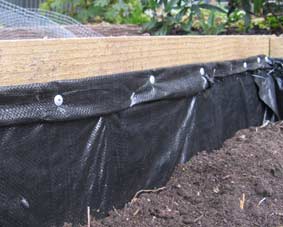
Woven weed matting folded
over and secured with screws.
- Take a 40 cm section of 100mm PVC pipe and connect to a 100 mm T piece.
- Where the T piece sticks out at right angles put in a 100 to 50 mm reducer.
- Connect a 50 mm T Piece to the end of the 50 mm reducer so that the two ends of the 50 mm T piece stick out horizontally,
- Place the completed section next to the PVC outlet/observation pipe
You could even use all 50 mm pipe and do away with having to use a reducer, but this would mean you would have a very small inlet for watering.
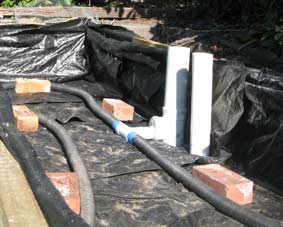
14. Lay out
Drainage pipe and cover with stones
- Attach a length of 50 mm agricultural drainage pipe to one end of the 50 mm PVC T piece. Then snake it around the bottom of the wicking bed and attach the other end to other side of the 50 mm T piece.
- Spread stones evenly across the bottom of the bed to a height of around 7 cm.
15. Cover
with weed matting and fill with soil.
- Cover the top of the stones with two layers of non woven weed matting. Where the PVC pipes stick up cut holes in the matting and push it over the tops of the pipes.
- Fill with friable soil until nearly full.
The weed matting is to stop the soil from mixing with the stones as water has to move freely through. So it is important to tuck the matting right up against the walls of the bed. You could probably get away with one layer of weed matting but as it is relatively cheap I thought it was worth using an extra layer just to make sure.
For the best results the soil needs to be friable sandy soil. Heavy clay soils will not do. If your soil is heavy then mix it with sand and mulch to make it more friable.
16. tack
sides and top up with soil
- Fold over the woven weed matting and tack it to the sides using 13 mm button head needlepoint screws. If the end of the weed matting is too long then cut some of it off before folding it.
- Top up with a bit more soil
You now have a finished wicking bed.
CONCLUSION
This design proved very successful. The only thing I would definitely have done differently is use an extra four landscape nails to nail the bottom and top sections of the walls together as there was some miner lifting at the corners due to the aging of the timber. Using some extra nails would probably have stopped this.
But it also might have been wise to put down a few centimetres of fine sand before laying out the pond liner, which is standard practice when building a conventional pond.