

vegetable
patch design
Wicking Beds
how to build a wooden wicking bed - page 1
This page offers step by step
instructions on how to build
a 3.6 metre long by 1.2 metre wide raised wooden wicking bed.
1. Gather required
materials
The Raised Wooden bed Materials List page lists the materials I
used to make this bed. Naturally this list should only be seen as
a rough guide. Feel free to substitute what you think would work
better for you.2. Cut the end beams
- Cut the two 2.4 metre ironwood beams so you have 4 1.2 metre lengths. These will form the ends of the wicking bed.
3. Level Ground
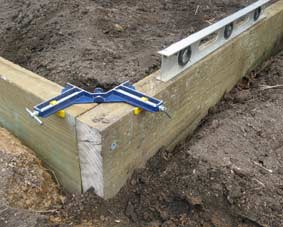
Two ends clamped and screwed together using 100 millimetre bugle batten screws.
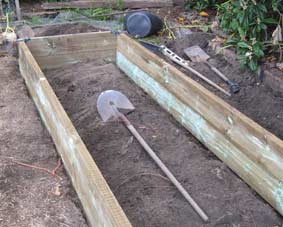
The two 3.6 X 1.2 metre rectangles sitting one on top of each other ready to be nailed together.
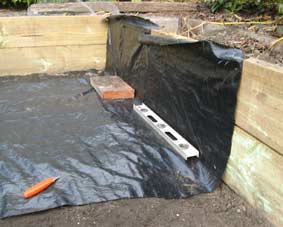
Woven weed matting being laid out.
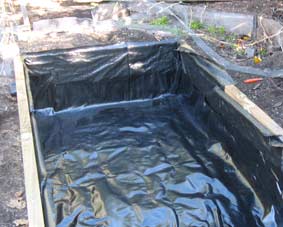
Wicking bed with pond liner laid out on top of woven weed mat. The pond liner only reaches 10 cm up the sides of the walls where as the weed matting goes all the way to the top.
Two ends clamped and screwed together using 100 millimetre bugle batten screws.
The two 3.6 X 1.2 metre rectangles sitting one on top of each other ready to be nailed together.
Woven weed matting being laid out.
Wicking bed with pond liner laid out on top of woven weed mat. The pond liner only reaches 10 cm up the sides of the walls where as the weed matting goes all the way to the top.
- Level a section the ground where you are to build the raised bed.
4. Clamp and screw beams
- On the levelled ground or trench clamp together two 3.6 metre and two 1.2 metre beams to form a rectangle.
- Screw two 100 millimetre bugle batten screws into each end.
- Repeat the process to create another rectangle directly on
top of the first first one.
For more details on how to put a wooden frame together see the Building a Raised Wooden Bed Frame webpage.
5. nail the rectangles
together
- With a long 8 mm drill bit drill pilot holes into the top rectangle and nail 250 millimetre landscape nails into these pilot holes to firmly secure the two rectangles together.
You should now have a rectangular wooden box 3.6 metres long by 1.2 metres wide and 40 centimetres high.
6. level soil and beams
- Using a spirit level make sure the top beams are absolutely level then smooth out the soil in the bottom so it is as level as possible with the bottom beams.
- Remove any sticks or stones so that the soil is not only level but very smooth.
7. drill the overflow
outlet hole
- Halfway down one side of the bed drill a 20 millimetre hole so that the bottom of the hole is 7 cm above the bottom of the side of the bed.
8. Lay out the weed
matting.
- Lay a layer of woven weed matting so it completely covers both the bottom and sides of the bed.
- Use a staple gun to tack the matting to the sides of the bed.
9. Lay out pond liner
- Lay the pond liner on top of this weed matting so that the liner is about 10 centimetres high on the sides of the walls.
- Using a staple gun staple the pond liner to the walls to hold the liner in place, but make sure you only staple the very top of the pond liner at points above the intended high water mark .
10. insert 20 mm threaded
tank outlet.
- Cut a hole through the pond liner and woven weed matting where it covers the overflow outlet hole you have drilled into the timber and insert the 20 mm threaded tank outlet.
- Screw in the threaded covers so the pond liner and weed matting is clamped firmly to the wood.
11. Lay another layer of weed
matting
- Lay another layer of woven weed matting over the pond liner and the first layer of weed matting. Again use a staple gun to tack the weed matting in place.
- Where the weed matting covers the threaded tank outlet cut a small hole the matting to let the outlet poke through.